How to Connect a Diffuser to an HVAC System: A Step-by-Step Guide
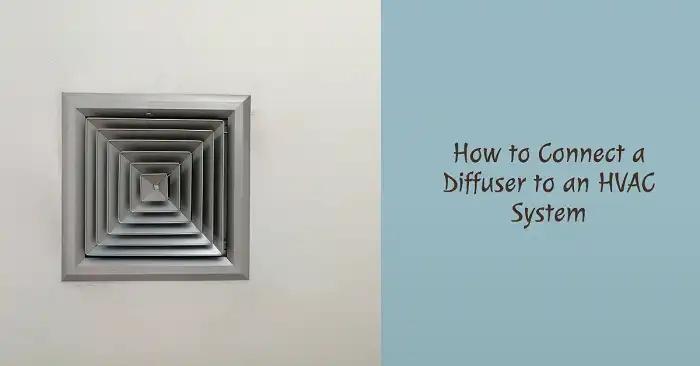
Short Answer: To connect a diffuser to an HVAC system, the diffuser is installed at the end of the air duct to evenly distribute air in a room. This process involves selecting the right size and style of diffuser, attaching it securely to the duct, and ensuring proper airflow by sealing any gaps. Diffusers can be connected to both supply and return ducts, helping regulate airflow and temperature in your home.
What Is a Diffuser in an HVAC System?
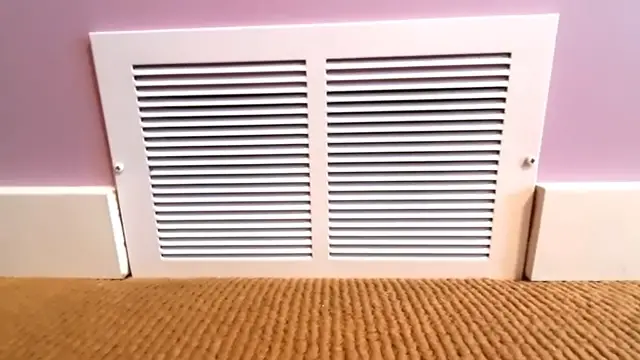
A diffuser is a component of the HVAC system that helps control and distribute airflow in a room. Typically installed in ceilings, walls, or floors, diffusers ensure that conditioned air from the HVAC system is spread evenly throughout a space. They play a critical role in regulating air distribution for optimal comfort and temperature control. The right diffuser improves airflow efficiency, minimizes noise, and enhances the overall performance of your HVAC system.
How Do You Select the Right Diffuser?
Before connecting a diffuser to your HVAC system, it’s important to choose the right size and style. Diffusers come in various types, including ceiling diffusers, wall diffusers, and floor diffusers, each designed for specific applications.
When selecting a diffuser, consider the following factors:
- Size of the Room: Larger rooms require diffusers with a wider distribution range, while smaller rooms may need more compact options.
- Type of Installation: Ceiling-mounted diffusers are common in central HVAC systems, but you can also opt for wall-mounted or floor-mounted options depending on your duct layout.
- Airflow Capacity: The diffuser should match the airflow capacity of the HVAC system to ensure balanced air distribution.
After selecting the diffuser, ensure it matches the diameter of your air ducts for proper installation.
How Do You Install a Diffuser to the HVAC System?
Step 1: Position the Diffuser
Start by positioning the diffuser where the air needs to be distributed. The diffuser typically attaches to the end of a supply duct to release air or a return duct to draw air back into the system.
Step 2: Connect the Duct to the Diffuser
Once you’ve positioned the diffuser, align the duct with the diffuser’s neck. Insert the duct into the diffuser and use duct clamps or screws to secure it. Ensure a tight connection to prevent air leaks. If the duct doesn’t fit snugly, use duct tape to seal any gaps.
Step 3: Seal and Insulate
After securing the diffuser to the duct, apply sealant or tape around the connection points to prevent air leakage. Insulating the ductwork can also improve energy efficiency and reduce heat loss.
Step 4: Test the System
Once installed, turn on your HVAC system and check the airflow through the diffuser. Make sure that air is being distributed evenly and that there are no rattling or airflow restrictions.
How Does a Diffuser Impact Airflow in the HVAC System?
A properly connected diffuser ensures that air is delivered evenly throughout the room, avoiding hot spots or cold spots. Diffusers come with adjustable vanes or louvers that allow you to control the direction and volume of the airflow. This means you can customize the airflow to your preferences for better comfort and energy efficiency.
If you experience poor airflow or uneven temperatures after installation, it could indicate that the diffuser wasn’t properly aligned with the duct, or that the ductwork itself has leaks or blockages. Regular inspection and maintenance are key to keeping the system running efficiently.
FAQs
Can I install a diffuser myself, or do I need professional help?
You can install a diffuser yourself if you’re comfortable with basic DIY tasks. However, for more complex HVAC systems or if you’re unsure about ductwork connections, it’s best to consult a professional to ensure proper installation and avoid air leaks.
What type of diffuser should I use for ceiling installation?
Ceiling diffusers are typically the most common choice for central HVAC systems. Choose one with adjustable vanes or louvers to control the airflow direction and volume, ensuring even air distribution throughout the room.
Will adding a diffuser increase the efficiency of my HVAC system?
Yes, a properly installed diffuser can help balance airflow, reduce hot or cold spots, and improve overall energy efficiency. It allows for more precise control over where and how air is distributed.
How often should I clean or replace my HVAC diffuser?
Diffusers should be cleaned at least once every 6 months to remove dust and debris that can block airflow. If the diffuser becomes damaged or excessively dirty, it may need to be replaced.
Can a diffuser help with noisy airflow from my HVAC system?
Yes, a well-chosen diffuser can help minimize noise caused by air rushing through the ducts. Look for diffusers specifically designed for noise reduction or with adjustable vanes to control airflow speed.
Wrapping Up
Connecting a diffuser to an HVAC system is a straightforward task that requires proper alignment and sealing of the ductwork. By ensuring a tight connection and selecting the appropriate size and type of diffuser, you can improve air distribution, reduce noise, and increase the efficiency of your heating and cooling system. Regular maintenance and testing can help ensure long-term performance and comfort in your home. If you’re unsure about the installation process, contacting an HVAC professional can help ensure the job is done correctly.

